Share host filsystem to guest using virtfs 9p filesystem passthrough

Virtfs is a virtualization aware filesystem passthrough..Sharing host files on the guest through generic network file systems like NFS and CIFS suffer from major performance and feature deficiencies as these protocols are not designed or optimized for virtualization. To address the needs of
the virtualization paradigm, a new paravirtualized file system called VirtFS has been intorduced. Virtfs takes features of 9p2000.L protocol.

Using virtfs, you can share filesystem of host to the guest system. It works via para virtual transport mechanism called ‘virtio’. Virtfs has been implemented with ‘zero copy’ mechanism. This is a key advantage of VirtFS compared to using a network file system which would always require at least one (but usually more) data copies.

There are mainly 2 components in this implementation.

1)  virtio-9p-pci device ::

This will be used to transport protocol messages and data between the host
and the guest.

2) ‘fsdev’ device :

This is used to define the export file system characteristics like file
system type, security model .

For more about the implementation details,please  look at reference section..

Below is demo of this feature in “qemu” , “kvm”, “libvirt” environment.

Host system details : Fedora 15 :

[root@humbles-lap Desktop]$ cat /etc/redhat-release
Fedora release 15 (Lovelock)
[root@humbles-lap Desktop]$ uname -r
2.6.43.5-2.fc15.x86_64

Guest System details:  Fedora 16:

[root@localhost mnt]# cat /etc/redhat-release
Fedora release 16 (Verne)
[root@localhost mnt]# uname -r
3.1.0-7.fc16.x86_64
[root@localhost mnt]#

First of all, check support for above mentioned components ( virtio-9p-pci & fsdev) in host system qemu-kvm binary..

Host:

[root@humbles-lap Desktop]$ qemu-kvm –help|grep virtfs
-virtfs local,path=path,mount_tag=tag,security_model=[mapped|passthrough|none]

[root@humbles-lap Desktop]$ qemu-kvm device ?

name “virtio-9p-pci”, bus PCI

[root@humbles-lap Desktop]# lsmod |grep virt
9pnet_virtio           13416  0
9pnet                  73543  1 9pnet_virtio
virtio_net             23133  0
[root@humbles-lap Desktop]#

Guest Kernel has to support 9p:

[root@humbles-lap bin]#  grep 9P /boot/config-$(uname -r)
CONFIG_NET_9P=m
CONFIG_NET_9P_VIRTIO=m
CONFIG_NET_9P_RDMA=m
# CONFIG_NET_9P_DEBUG is not set
CONFIG_9P_FS=m
CONFIG_9P_FSCACHE=y
CONFIG_9P_FS_POSIX_ACL=y

IN HOST SYSTEM:
—————————————————-

The below string has to be specified with ‘qemu-kvm’ process to export a ‘virtfs’ filesystem for guest.

-virtfs local,path=[path to share],security_model=[mapped|passthrough|
none],mount_tag=[mount tag]

Where : Path = Sharing filesystem path
security_model: This can be either “mapped” or “passthrough”..
mount_tag: This is the idenitifier which can be used in guest when moutning.

The easiest way for defining this is, placing it in the guest configuration file..


< source dir='/misc/shared'/>

< address type='pci' domain='0x0000' bus='0x00' slot='0x06' function='0x0'/>

After placing this in “guest configuration” file:

Start the guest :

ex: virsh create Fedora-16.xml

Check for “qemu-kvm” process to know whether “virtfs” options has been picked properly..

[root@humbles-lap Desktop]# ps aux |grep qemu-kvm
qemu      7473  0.8  8.0 1356940 314552 ?      Sl   17:00   0:27 /usr/bin/qemu-kvm -S -M pc-0.14 -enable-kvm -m 1024 -smp 1,sockets=1,cores=1,threads=1 -name Fedora-16 -uuid 75d12600-d3c5-9bb1-7d0a-5ed0e550f5ee -nodefconfig -nodefaults -chardev socket,id=charmonitor,path=/var/lib/libvirt/qemu/Fedora-16.monitor,server,nowait -mon chardev=charmonitor,id=monitor,mode=control -rtc base=utc -boot c -drive file=/var/lib/libvirt/images/Fedora-16.img,if=none,id=drive-virtio-disk0,boot=on,format=raw -device virtio-blk-pci,bus=pci.0,addr=0x4,drive=drive-virtio-disk0,id=virtio-disk0 -drive if=none,media=cdrom,id=drive-ide0-1-0,readonly=on,format=raw -device ide-drive,bus=ide.1,unit=0,drive=drive-ide0-1-0,id=ide0-1-0 -fsdev local,security_model=passthrough,id=fsdev-fs0,path=/misc/shared -device virtio-9p-pci,id=fs0,fsdev=fsdev-fs0,mount_tag=test_mount,bus=pci.0,addr=0x6 -netdev tap,fd=24,id=hostnet0,vhost=on,vhostfd=25 -device virtio-net-pci,netdev=hostnet0,id=net0,mac=52:54:00:80:db:8d,bus=pci.0,addr=0x3 -chardev pty,id=charserial0 -device isa-serial,chardev=charserial0,id=serial0 -usb -device usb-tablet,id=input0 -vnc 127.0.0.1:0 -vga cirrus -device virtio-balloon-pci,id=balloon0,bus=pci.0,addr=0x5

IN GUEST SYSTEM:

You have to mount the shared filesystem using “9p” . Use below command for the same:

#mount -t 9p -o trans=virtio test_mount /mnt

Where,

Filesyste type: 9p
Transport mechanism: virtio
Mount tag: This is the tag ‘test_mount’ which used when sharing from host system.
Mount Point: /mnt

Check for filesystem :

HOST

[root@humbles-lap shared]# pwd
/misc/shared
[root@humbles-lap shared]# echo “Hi Guest” –> virtfs_file
[root@humbles-lap shared]#

GUEST:

[root@localhost mnt]# mount |grep test_mount
test_mount on /mnt type 9p (rw,relatime,sync,dirsync,trans=virtio)
[root@localhost mnt]# pwd
/mnt
[root@localhost mnt]# cat virtfs_file
Hi Guest

Reference: www.kernel.org/doc/ols/2010/ols2010-pages-109-120.pdf

Nested virtualization with KVM/VMX OR Guest inside guest in kvm in fedora linux

I would like to explain “nested Virtualization” in my own terms . How-ever it is already documented , so I am just quoting some bits from the same.

On Intel processors, KVM uses Intel’s VMX (Virtual-Machine eXtensions)
to easily and efficiently run guest operating systems. Normally, these guests
*cannot* themselves be hypervisors running their own guests, because in VMX,
guests cannot use VMX instructions.

The “Nested VMX” feature adds this missing capability – of running guest
hypervisors (which use VMX) with their own nested guests. It does so by
allowing a guest to use VMX instructions, and correctly and efficiently
emulating them using the single level of VMX available in the hardware.

Terminology
———–

Single-level virtualization has two levels – the host (KVM) and the guests.
In nested virtualization, we have three levels: The host (KVM), which we call
L0, the guest hypervisor, which we call L1, and its nested guest, which we
call L2.

Running nested VMX
——————

The nested VMX feature is disabled by default. It can be enabled by giving
the “nested=1” option to the kvm-intel module.

No modifications are required to user space (qemu). However, qemu’s default
emulated CPU type (qemu64) does not list the “VMX” CPU feature, so it must be
explicitly enabled, by giving qemu one of the following options:

     -cpu host              (emulated CPU has all features of the real CPU)

     -cpu qemu64,+vmx       (add just the vmx feature to a named CPU type)

Instead of explaining a lot of theory about it, I will demo its use:

[cc]

//Checking whether “kvm_intel” will support this parameter?

[root@humbles-lap Humble]# modinfo kvm_intel

filename:       /lib/modules/2.6.43.5-2.fc15.x86_64/kernel/arch/x86/kvm/kvm-intel.ko

license:        GPL

author:         Qumranet

depends:        kvm

intree:         Y

vermagic:       2.6.43.5-2.fc15.x86_64 SMP mod_unload 

parm:           vpid:bool

parm:           flexpriority:bool

parm:           ept:bool

parm:           unrestricted_guest:bool

parm:           emulate_invalid_guest_state:bool

parm:           vmm_exclusive:bool

parm:           yield_on_hlt:bool

parm:           fasteoi:bool

parm:           nested:bool

parm:           ple_gap:int

parm:           ple_window:int

// This feature is "disabled" by default..

[root@humbles-lap Humble]# cat /sys/module/kvm_intel/parameters/nested 

N

// Remove the module

[root@humbles-lap Humble]# rmmod kvm_intel

[root@humbles-lap Humble]# lsmod |grep kvm_intel

[root@humbles-lap Humble]#

// Make the 'nested' boolean "ON" and reload:

[root@humbles-lap Humble]# insmod /lib/modules/2.6.43.5-2.fc15.x86_64/kernel/arch/x86/kvm/kvm-intel.ko nested=Y

[root@humbles-lap Humble]# lsmod |grep intel

kvm_intel             132406  0 

snd_hda_intel          33276  3 

snd_hda_codec         115767  3 snd_hda_codec_hdmi,snd_hda_codec_realtek,snd_hda_intel

snd_pcm                97170  4 snd_hda_codec_hdmi,snd_hda_intel,snd_hda_codec

snd                    78908  14 snd_hda_codec_hdmi,snd_hda_codec_realtek,snd_hda_intel,snd_hda_codec,snd_hwdep,snd_seq,snd_seq_device,snd_pcm,snd_timer

kvm                   407039  1 kvm_intel

snd_page_alloc         18101  2 snd_hda_intel,snd_pcm

intel_ips              18304  0

[root@humbles-lap Humble]# cat /sys/module/kvm_intel/parameters/nested 

Y

[root@humbles-lap Humble]#


[/cc]

Now, if you are configuring a virtual machine or guest as another hypervisor, you should have virtualization support in its processor. For that you have to export your CPU as "vmx" enabled one. You can achieve this by editing guest configuration file and then starting the vm.

Below is my guest configuration file wrt to the CPU session . The important field here is ""


[cc]

[root@humbles-lap Humble]# cat /etc/libvirt/qemu/rhel5.4-x86_64-kvm.xml |grep -w cpu -A 13

  <cpu match='exact'>

    <model>Westmere</model>

    <vendor>Intel</vendor>


    <feature policy='require' name='est'/>

    <feature policy='require' name='monitor'/>

    <feature policy='require' name='ss'/>

    <feature policy='require' name='vme'/>


    <feature policy='require' name='ht'/>

    <feature policy='require' name='ds'/>


    <feature policy='require' name='tm'/>


--

  </cpu>


[/cc]

//Then I started this VM via "virsh" command..

[root@humbles-lap Humble]# virsh create /etc/libvirt/qemu/rhel5.4-x86_64-kvm.xml
Domain rhel5.4-x86_64-kvm created from /etc/libvirt/qemu/rhel5.4-x86_64-kvm.xml

[root@humbles-lap Humble]#

// Check the 'qemu-kvm' process for "+vmx" flag

[root@humbles-lap Humble]# ps aux |grep -i qemu-kvm |grep vmx
qemu      8389 50.6  1.3 872040 53908 ?        Sl   23:26   0:06 /usr/bin/qemu-kvm -S -M pc-0.13 -cpu core2duo,+lahf_lm,+rdtscp,+aes,+popcnt,+sse4.2,+sse4.1,+xtpr,+cx16,+tm2,+est,+vmx,+ds_cpl,+pbe,+tm,+ht,+ss,+acpi,+ds -enable-kvm -m 512 -mem-prealloc -mem-path /dev/hugepages/libvirt/qemu -smp 2,sockets=2,cores=1,threads=1 -name rhel5.4-x86_64-kvm -uuid b2d13137-ff17-d505-0a6b-fb79c867584a -nodefconfig -nodefaults -chardev socket,id=charmonitor,path=/var/lib/libvirt/qemu/rhel5.4-x86_64-kvm.monitor,server,nowait -mon chardev=charmonitor,id=monitor,mode=control -rtc base=utc -boot c -drive file=/misc/guest-images/rhel5.4-x86_64-kvm.img,if=none,id=drive-ide0-0-0,format=raw -device ide-drive,bus=ide.0,unit=0,drive=drive-ide0-0-0,id=ide0-0-0 -netdev tap,fd=21,id=hostnet0 -device rtl8139,netdev=hostnet0,id=net0,mac=54:52:00:6c:6e:70,bus=pci.0,addr=0x3 -chardev pty,id=charserial0 -device isa-serial,chardev=charserial0,id=serial0 -usb -vnc 127.0.0.1:0 -k en-us -vga cirrus -device virtio-balloon-pci,id=balloon0,bus=pci.0,addr=0x4
[root@humbles-lap Humble]#

Once "VM" started, try to login to that VM and see whether its processor support virtualization..


[cc]

[Humble@humbles-lap ~]$ ssh root@192.168.122.125
root@192.168.122.125's password:
Last login: Thu Jun 14 23:28:20 2012
[root@dhcp208-238 ~]# cat /proc/cpuinfo |grep -i vmx
flags        : fpu vme de pse tsc msr pae mce cx8 apic sep mtrr pge mca cmov pat pse36 clflush mmx fxsr sse sse2 ss syscall nx rdtscp lm constant_tsc pni vmx ssse3 cx16 sse4_1 sse4_2 popcnt lahf_lm

[/cc]

Now you have to believe me that this VM can act as a host/hypervisor system for another VM.


As you do in a host system, try to create VM inside this guest and play.


Reference# nested-vmx.txt in kernel source

Explore “Qemu Tracing ” ..

Qemu provides a new “tracing” mechanism which can be used in conjuction with several backends.. Especially useful to make use of it via “system Tap” which shipped with most of the distros..   The trace points are really useful when debugging or when doing performance analysis. The trace events can be enabled/disabled at run time.. …

Read more

Memory ballooning and virtio_balloon driver in qemu-kvm

Lots of people have heard the word “ballooning” and had a thought about it. In the computer world, this word is mostly aligned with ‘virtualization’. I will try to explain ‘memory ballooning’ in this blog.

In simple terms a virtual environment composed of 2 things.

1) HOST and 2) GUEST. Let me explain these 2 terms in a layman language. Virtualization is used to run another operating system inside your computer. The operating system running in your hardware can be called ‘HOST’ and the other operating system running in your HOST is called GUEST.

I have to answer that, guest memory is derived from Host memory. That is obvious. I am not explaining more about it, only because I just dont want to invite more confusion here..

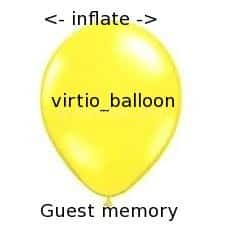
coming into the word ‘balloon’, we all know there can be two actions inflate/deflate wrt to balloon. Inflate means ‘you are filling something in it”, deflate do opposite action.. Now, how these all terms fit into virtualization.

The guest system will include a balloon ( a balloon driver ex: virtio_balloon) which can be inflated or deflated. Why we need that? as I mentioned above, guest memory is part of the host memory. There will be different applications running in your host system. Sometimes a host system which hosting these different applications can run out of memory or in need of memory… At that time, using this balloon device, the host system can request memory from the guest. which will cause an inflate operation of the balloon device inside the guest. Once the balloon is filled ( memory /pages ) by guests, it can give that to the host system. The vice versa operation is also going in this way.

Now you know, host<-> guest co-operation is required for smooth operation of ‘memory ballooning’. At the time of ‘inflate’ operation, think about ‘unused’ memory in the guest system. This memory is given back to the host. How-ever inflate operation can increase memory pressure in the guest..or you may see high ‘swapping’ in your guest.

The operation chain can look like this:

  • Request ( from host ) to reclaim memory =====> “inflate” operation inside the guest ::
  • Then guest send this memory back to host/hypervisor..

In qemu-kvm setup , virtio_balloon is the balloon driver which will be loaded in the guest system for the balloon device..

Inflate and Deflate operation ( In my bad art skills ? 🙂 ) :

1) Inflate operation of virtio balloon driver:

2) Deflate operation of virtio balloon driver

Now, there can be some questions like, Is it the hot memory add feature? I cannot agree with this.

What commands can be used to give/take memory from guests? in libvirt, qemu-kvm setup you can use ‘virsh setmem’ command for the same purpose.

Demo:

[root@humbles-lap misc]# virsh dumpxml 1
524288 ========== This is the maximuim memory set for this guest
524288 ========== current allocated memory

memballoon model='virtio' ========== virtio driver is used as balloon driver. If you want to disable ballooning use 'none'.


Now, check the memory inside the guest.

You will be seeing something near to ‘524288’..

Once you confirmed above, try to set memory as shown in below example:

#virsh setmem 24161

Now check the memory inside your guest..

This is how virtio_ballon or balloon drivers work!

I hope you enjoyed this article. Please feel free to ask your questions here or leave a comment.

Xen and Kvm

Hey Guys , Thought of sharing some bits on most popular open source virtualization technologies .. Yeah .. it is “Xen” and “Kvm“. Mainly I am focusing more on the hypervisor loading process and features. Xen Xen originated as a research project at the University of Cambridge, led by Ian Pratt, senior lecturer at Cambridge …

Read more

How can I increase a virtual image disk space if it is created on a file image

This is a very useful method in your real life.. I have come across to increase the space in virtual machine when it created on a file image .. You can try any of the below to increase the space depending on the virtual guest’s storage .. That being said , it is possible to …

Read more

How to know actual memory/RAM installed in Xen Host system?

I always hear complaints on “actual memory ( RAM ) displayed in XEN host system is NOT CORRECT or how to know actual physical RAM in Xen host system” …

Knowingly/unknowingly we execute the command “free” command in Xen host system and will complain as mentioned. “free” command wont help you here, because ‘free’ will show you the physical memory available for Dom0 or Privileged Guest. This command can not help you in this situation or if you are running XEN virtualization in your system/setup.

But there is another way to get the exact information!!!. Thats what you are looking for, Isnt it ? here it is:

Fire the command “xm info” in your Xen host system and grep for “memory”

# xm info |grep -i memory

Did you try and see the result? 🙂